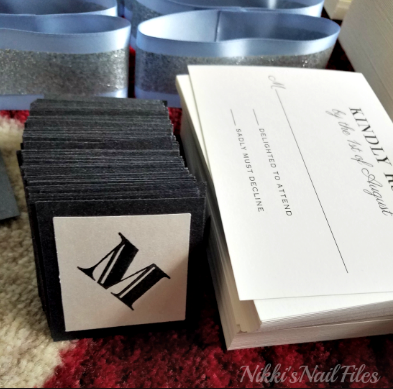
Ahh, our wedding invites arrived!
I searched and searched online and finally found a design I loved at Paper Source. They are seriously GORGEOUS. It's funny because it literally took us four hours to design them with the Paper Source designer. FOUR.HOURS. But what can I say? It was worth it.
I am obsessed. We were going for a traditional and classic invite without a bunch of colors. If fact, it ended up being silver, white, and dark gray. This is what the full suit looks like:
Because of the silver foil we went plain for the details and rsvp cards. However, leaving the trifold alone looked unfinished. We decided to do a ribbon band with a stamped and embossed monogram of our last initial. That was the only thing we had to assemble ourselves but believe me it took forever. First we (I) had to cut 80 portions of the blue ribbon. Then I had to cut equal amounts of the silver ribbon. Then we had to punch out the bigger black squares. Then we had to punch out the smaller silver squares. Then we had to stamp each one, layer the powder, and use the embossing gun (which is super fun BTW and that might get a post of its own) and then we had to adhesive it all together. We wanted the monogram to be attached the band of ribbons but make it so the band of ribbons would slide off the invite.
And then this is what the invite looked like before it was ready to be stuffed in the envelope. We printed the envelopes in a faux calligraphy (calligraphy is SO expensive I found out and I was too chicken to try to DIY that).
Apologies for the poor photos. I only used my good camera for some of them! Alright, so we have to get these in the mail and then start the nail-biting-inducing process of waiting for the rsvps to roll in!


No comments
Post a Comment
Thank you for reading! Leave a comment below or email me at nikkisnailfiles[at]gmail[dot]com to share your ideas. Feel free to leave links to your posts so I can check them out!