Bucket List #126: Tough Mudder - My Experience with the Tough Mudder Half

I'm so excited for this post because I'm checking something off my bucket list! I completed a Tough Mudder along with my brother, brother-in-law, and my brother-in-law's cousin (does that make him my cousin-in-law?).
Tough Mudder is a team race that focuses on completing a series of obstacles rather than speed/time. This is a map of the course for the full, half, and 5k participants. We did the Half so we ran 5 miles and completed 13 obstacles. By the end I was struggling!
The weather on the day of the race was intermittent pouring but we didn't mind. You're getting dirty anyway you know? Plus the rain added a level of legitimacy to the mud that made the race that much better.  Loved it! It also made us feel super bad ass.

I do not take pretty running photos. So I'm going to put this photo up and then let's not talk about it, mmmkay? I'm right next to the red elbow. That's my cousin-in-law pointing at the camera and my brother-in-law in the blue. I'm making a suuuuper attractive face yes?? Moving on.
My brother takes great running photos though. Look at how happy he looks to be alive (he's in the gray):
I definitely should have trained just a tiny bit more.

Let me walk you though the obstacles we completed:

1. Bale Bonds - a series of hay bales that you had to jump over. Yes, they were almost as tall as I was. No, I didn't need help to make it over them.
My brother had the easiest time jumping over these. And look at that mud on his shins! Glorious!

2. Quagmire - I honestly don't remember what this one was about. Suffice it to say it was probably muddy. According to the TM website it was 1000 gallon 10 foot crate of mud (yummy) with an 8 foot climb out at the end.

3. Berlin Walls - This obstacle was no joke. A daunting 10 foot wall that you had to jump up and hoist yourself over, only to have to find a way down. I think I'm slightly scared of heights because this one made my heart pound a little more than the running did.
Image result for tough mudder berlin wall
(This photo is not of me or my particular race. It just shows the obstacle--taken from here)

4. Kiss of Mud - Army crawling for 40 feet under barbed wire in the mud and passing through dug out mud swamps? Yes. This one was kind of fun. Because it was SO muddy it was easiest just to kick off with your legs and slide on through.

5. Hero Carry - The only obstacle I legitimately failed at. You had to carry someone on your back and then switch half way through so they carried you on their back. I started out on brother's back, made it to the halfway mark, and then couldn't lift him, so I ended up going on my brother-in-law's cousin's back until the end. He's a personal trainer so he handled it well.

6. Mud Mile 2.0 - One of the hardest obstacles by far. Huge mounds of mud separated by varying depths of water. We all needed a lot of help on this one. I went first and then would grab my brother's hands and help pull him up. Then he would help the other two (I would try but I was pretty much useless). There were...7 of these I think. By the end my legs and arms were so tired. But we weren't done!
7. Skidmarked - This was one of the scarier obstacles. It was similar to Berlin Walls except that it was pitched at an angle so when you walked up to it it was angled toward you. Despite the fact that it was looming over me I was able to get up and over (with a LOT of assistance from the boys) and made it safely back down to the other side.

8. King of the Mountain  - A heap of haybales forming a pyramid. You climbed up each level, over the top, and then back down again. Wasn't too difficult except for the twig that I rammed my butt cheek into. I've got a nice bruise from that.
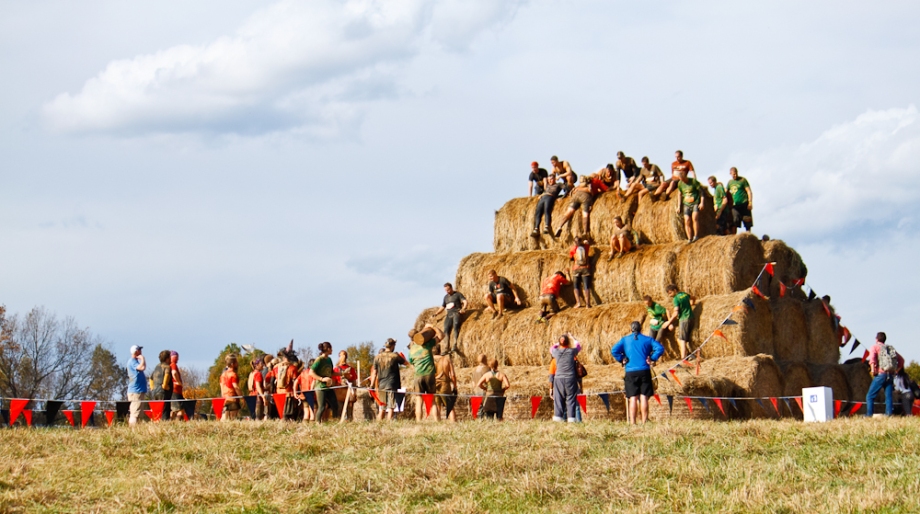
Image result for tough mudder king of the mountain
(Not from my race but shows what the obstacle generally was like. Taken from here.)

9. Pitfall - A pit of mud with a bottom that contained some holes and some steps. I had to walk very carefully and I still ended up submerged multiple times. You'd be walking fine and then bam, fell in a hole.

10. The Block Ness Monster - By far my favorite obstacle. A series of turning blocks in a pool of mud where you had to keep it spinning to hoist yourself, your teammate, or some random stranger over the top. Once they made it over the top they had to hold on and use their weight on the way down so you could get hoisted up. I was too short to reach the bottom so I had to tread water the whole time.
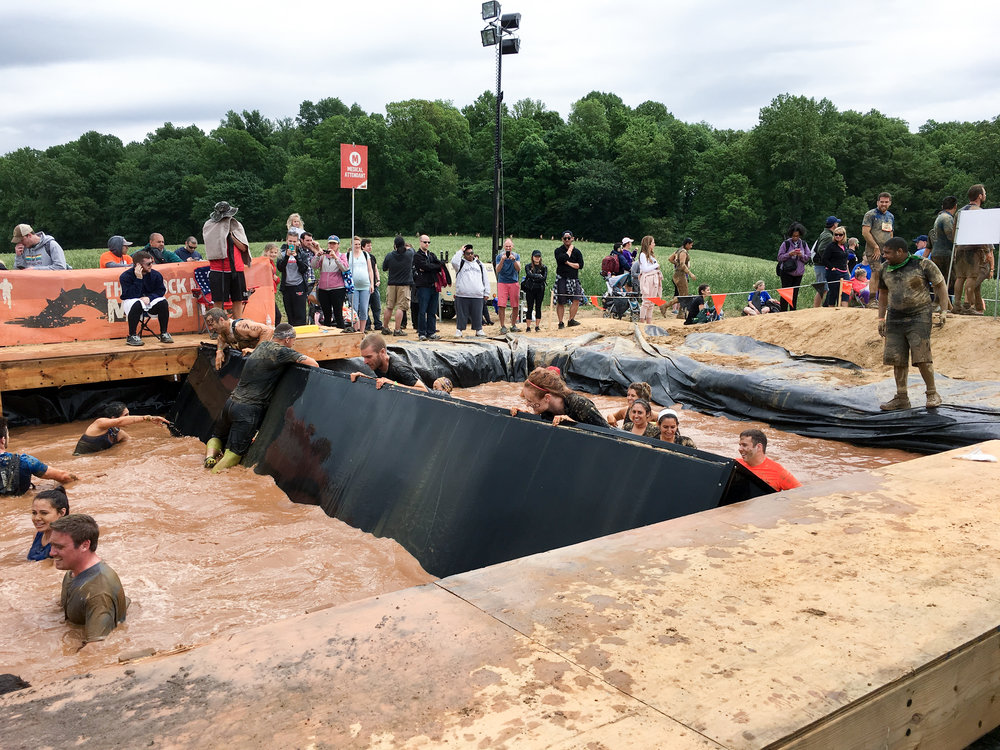
Image result for tough mudder block ness monster
(Not from my race. Taken from here.)

11. Devil's Beard - A long cargo net that you had to walk under. I took the easy way out and just followed a taller guy. So, even though my shortness was a pain at Block Ness monster it definitely came in handy here.

12. Everest 2.0 - The hardest and scariest obstacle. I nearly gave up.
Image result for everest 2.0
(Not from my race. Taken from here.)

I was able to run up the incline, reach the rope, and climb up, but then my arms just would not go anymore. I couldn't reach anyone at the time even though they were trying so hard to get to me. A guy from the bottom climbed up behind me on the rope (no lie) and tried to hoist me up further so I could reach them but eventually we ended up failing. I went to walk around the obstacle but two people started yelling at me that they could get me up the wall and not to give up. Against my better judgment I decided to listen and try again. Well, sure enough, I ran up the wall, climbed the rope, made it to a similar stopping point, and then they really stretched to grab my hand (they held someone by their legs and lowered her to reach me). Once they had my hand they grabbed one of my legs and up they pulled. I am eternally grateful for them helping me over that wall. There is no way I would have enjoyed it as much as I did if I failed at the most iconic Tough Mudder obstacle ever. I wish I knew who they were.

13. Happy Ending - One of the easier obstacles. Grab a rope and then walk up a way less steep incline, cross over the top, and then slide down a slide into the last pool.
Image result for tough mudder happy ending
(Not my race. Taken from here.)
After Happy Ending we climbed out of the pool and ran to the finish line. My arms were jelly and I was sure I broke my elbow on Everest but everything was fine and we made it through!

And I got some pretty sweet bruises as souvenirs. Lol.
Bruises from Tough Mudder
Overall we had a fantastic time and would definitely do it again. Maybe if I train I'll give the Tough Mudder Full a go! Here is a parting photo of me rocking my "Tough Mudder Half Finisher" T-shirt from when I was cleaned up. Such pride!

Honeymoon Tour: Paris - Day One

The City of Lights....La Ville Lumiere! Our first day in Paris! Some quick trivia for you:
*Paris is nicknamed the City of Lights because it was one of the first cities to have electricity.
*Also, the name "Paris" is derived from the Celtic tribe known as the Parisii who were its early inhabitants. The city was called Lutetia Parisorum, or "Lutetia of the Parisii," during the Roman era of the 1st to the 4th centuries AD.
*The city was renamed Pairs during the reign of Julian the Apostate, whoever he was...

Good to know, right? We arrived in Paris on a blustery somewhat chilly day and Andrew was able to get us from the aeroport to the taxi and from the taxi to to our very quaint (read: tiny) French hotel. We stayed at Hotel de Londres Eiffel, a family run small hotel with I think about 30 rooms. Could it get more French than this??
The concierge gave us a brief overview complete with map and kindly told us about all of the nearest metro stops, train stations, and attractions. After our brief "orientation" we were off for a two block walk from our hotel....and this is what I saw: 
The left photo is the first photo I ever took with the Eiffel Tower. And I finally got my Eiffel Tower selfie so I can check off Buck List #397!  We picked up a baguette, some cheese (muenster and some brie), and saucisse, and sat ourselves right in front of the Eiffel Tower so we could soak it all in and so I could calm down from hyperventilating that I was finally there. Oooh I won't lie, that muenster cheese was STINKY. I tasted good but left a really bad aftertaste. We ended up not eating it all. The baguette, saucisse, and baguette were gone in minutes though. Yum!
We then walked back to our hotel so we could get changed into something more appropriate for dinner. We had made reservations at 58 Tour Eiffel, one of the two restaurants in the Eiffel Tower for a late dinner.
The dinner was oh my god amazing. I tried to snap a photo of every course because I'm a foodie and wanted to capture every single thing..but let's just say I devoured some of the plates before I remembered to photograph it! Oh well, you have to live in the moment right??
Our view was the trocadero which proved very difficult to capture at night!
After dinner we headed back outside to see the Eiffel Tower twinkle. Every hour on the hour starting at about 9 PM the Eiffel Tower lights up and glistens in the evening sky. It was especially neat because the first twinkle happened while we were sitting at dinner (I told you it was late dinner!). The twinkle is frustratingly difficult to capture in a still photo because it doesn't look like much.
I made it a gif!
After we were done hanging out watching the Eiffel Tower we walked back to our hotel and called it a night. Catch up with me next time to find out what we did on Paris Day Two!

Coloring Nails (and other things) at Color Me Mine

A big part of why I created the 101 in 1001 list was so that every now and then Andrew and I would try our hands at something we haven't done before. So when Andrew had off during Christmas and New Years we decided to give pottery painting a try (AKA #84 on my 101 in 1001 list). Here's a recap of our pottery painting adventure. Oh but first, here is my nail design for today since we picked the pottery up yesterday:
I used OPI What's With the Cattitude, Art Deco Black, and Sally Hansen Camelflage.

So now that we have the nails out of the way, let's get back to painting other things. When you first walk in the store you notice shelves and shelves of possibilities to choose from. The place we went to had over 400 possible ceramic pieces for us to look at (according to their site)!
The pieces were a variety of sizes, uses, and prices. We looked at a couple mugs, salt and pepper shakers, vases, bowls, canisters, and plates but we decided to try our painting skills on two large dinner plates, an owl ornament, and a spoon holder. Then came the hard part, painting! If I can paint my nails does that mean I can paint other things?? Spoiler alert: No, it doesn't.
So focused!
The paint dried very chalk-like and you had to be careful to do multiple coats so it would be opaque post-kiln. I was in charge of the owl ornament and my dinner plate, while Andrew focused on his dinner plate and our spoon holder. Here is our pre-kiln ornament. I can't believe I forgot to take a true before photo of all our pieces!
And a pre-kiln photo of my plate. I forgot to photograph the actual front of the plate but this is the bottom of it. The top is just like the center (it's leopard on a "vanilla bean" background). The paint dries really chalky but she assured us that the post-kiln product would be nicely opaque and glossy.
After you paint them you have to leave them with the store so that the item can be properly dried, glazed, and fired in the kiln. Then you pick them up about a week later and you're good to go. I couldn't wait to see how they turned out! Here are our glazed and completed pieces:
The colors of Andrew's plate didn't come too well in my photo. The outer is more teal and the middle ring is more salmon-pink-orange than neon orange. Mine is of course the one on the right...you know how I feel about animal print. And our little owl Christmas ornament turned out so cute! I'm a bit obsessed with it and hung it in our apartment despite it no longer being Christmas and despite us no longer having a tree for ornaments.
Did you notice the difference between pre- and post-kiln?? The spoon holder will be added in a bit because apparently there was a little problem with the glazing and firing....we didn't get to pick it up yet. Of course we couldn't wait to eat dinner on the plates:
Speaking of dinner oh my god I made the biggest black bean burger yesterday with Mediterranean couscous (although I barely ate the couscous since the burger was TOO big). Props to Andrew for piling so little french fries on his plate! I wouldn't have had that restraint.

What do you think? Have you ever gone pottery painting? I so enjoyed it and can't wait to go back to do a pink and black zebra plate!

101 in 1001: #2 Complete My First Cross Stitch Stocking

Today's post is a completion of an item on my 101 in 1001 List: completing my very first cross stitch stocking! Here's a bit of background: everyone in my family has a beautiful handmade cross stitch stocking that says our name on it....well, everyone except my little brother. He has a store bought one that looks really lame compared the rest of ours hanging on the banister. During law school, I decided that I would try to make him one because he started hinting that it bothered him how he was the only one without a stocking like ours. He's not one to complain so I ordered this Dimensions Needlecrafts cross stitch kit off Amazon for $19.34 on January 1, 2014 in order to make him one. It may have taken almost 2 years for me to finish it but I successfully completed it as a Christmas gift this year. Here is the finished product!
Voila, I added a bow and called it a day. For more photos, keep reading!

When I first started I worked on the snowman and broom first:
It took almost exactly 2 years for me to finish the stitching. (Spoiler alert: I don't think those nails ever made it onto the blog here because I didn't like them.) Here is a photo before I started all the finishing edging and stuff (like the red detail on the snowman's scarf and the outlining on all the little creatures):

Then I went with my parents to pick out the fabric for the backing. My mom has made all of our childhood Halloween costumes and random holiday dresses so she was a pro on how to do the stocking. The kit already came with the fluffy lining so I only needed to get fabric. I cut to size, pinned it in place (ok my mom pinned it), and it was ready to be sewn into a stocking form. Shout out to my fantastic mom for staying up late to help me finish the stocking (and for doing the actual sewing because I have no clue what I'm doing).
Here is a before and after shot for the sewing:
And here is a comparison of my stocking (brought to you in 1990 or so) and my brother's new personalized stocking:
And one last time, the finished product ready to be hung with the rest of our family stockings!
So I can officially check this off my 101 in 1001 list (and my bucket list I think!). Now I have two more stockings on the way for Andrew and I. I didn't have a stocking for our apartment this year and I made him a quick crocheted one as a placeholder. I figure I'll have the others done in about 4 years, lol. I also have a Beauty and the Beast project requested by my sister. Oy vey, so much needlework! When will I ever have time to paint my nails?? Just kidding!

That Time I Tried on a Wedding Dress

Now that Steph's wedding is over I can finally post this and cross it off my bucket list. When we went to look a bridal gowns a funny thing happened....I ended up trying on a wedding gown. Now, before you go rolling your eyes thinking geez what an example of an overly eager maid of honor stay with me. I tried it on at my sister's request! She couldn't make her mind up between two absolutely gorgeous bridal gowns and she wanted to compare them while they were both on someone. So I stepped in to help her out, and in the process got to wear a pretty snazzy get up!
She ended up going with the one I had one because she liked the back more. 
Professional Blog Designs by pipdig